RazorPayX integration with Monitask
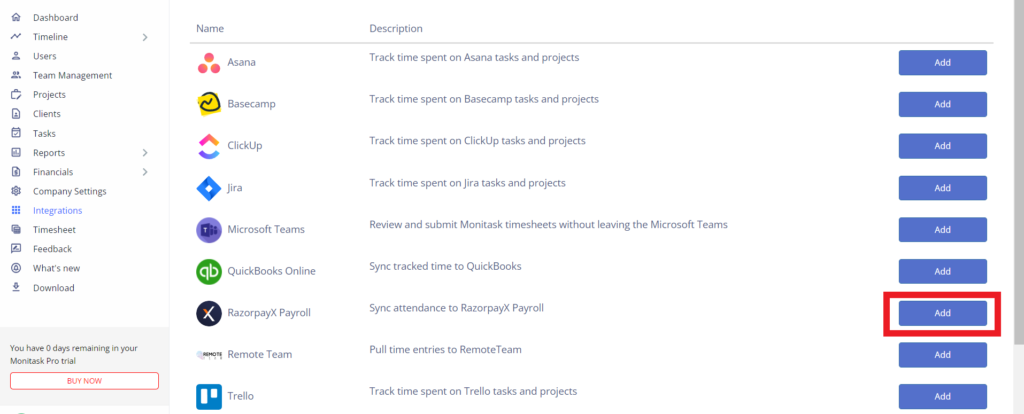
1) Browse the integration page in Monitask admin dashboard: https://app.monitask.com/integrations and click add RazorpayX integration
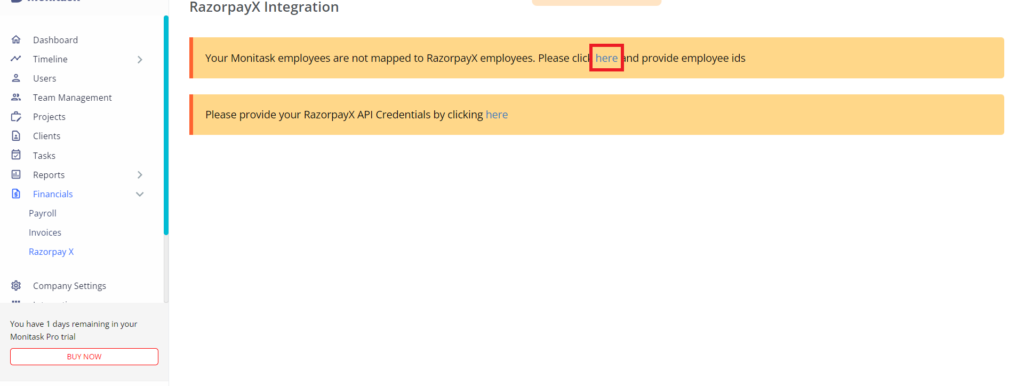
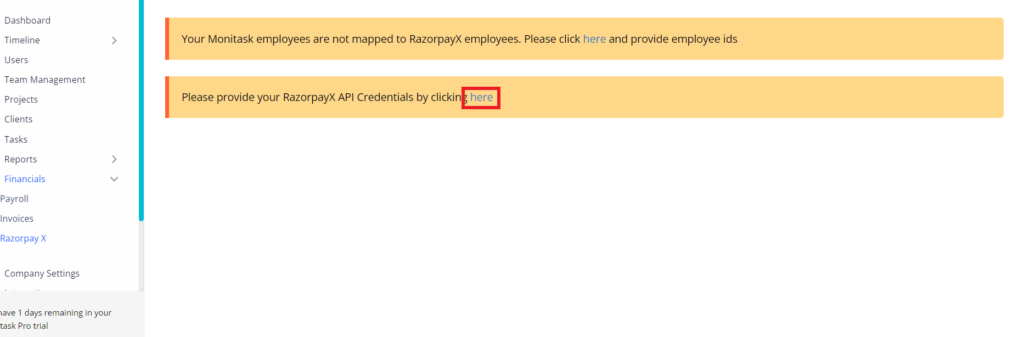
![](https://www.monitask.com/wp-content/w3-webp/uploads/2022/01/print13-1024x414.pngw3.webp)
2) Click here
![](https://www.monitask.com/wp-content/w3-webp/uploads/2022/01/Print2-1024x386.pngw3.webp)
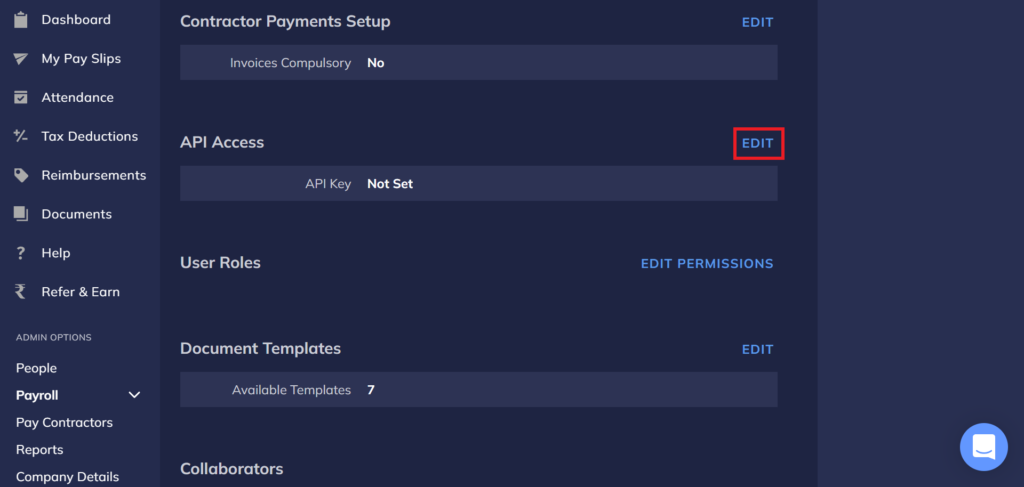
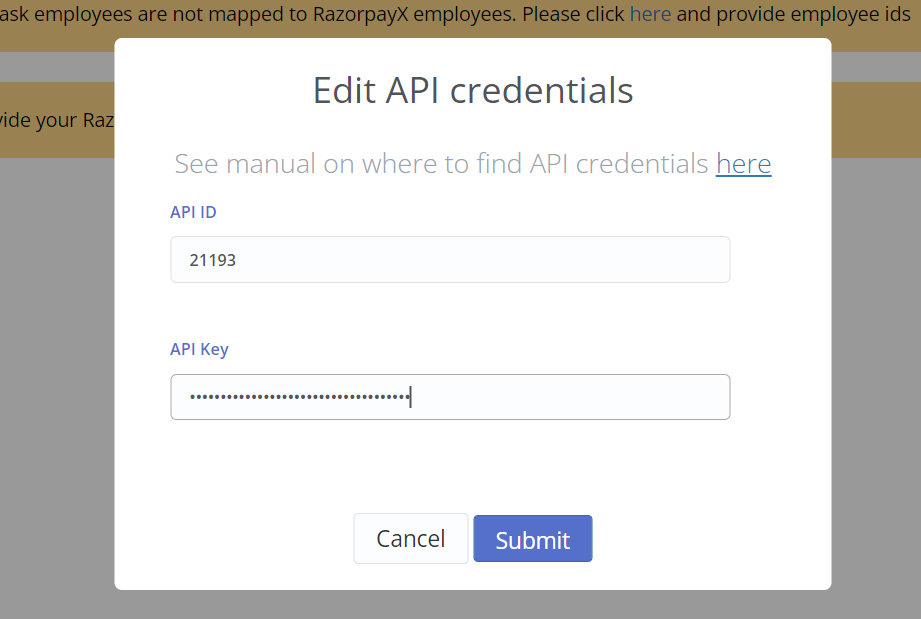
3) Open Settings on RazorpayX account and find your API ID and API Key and fill the form in Monitask
![](https://www.monitask.com/wp-content/w3-webp/uploads/2022/01/Print3-1024x487.pngw3.webp)
![](https://www.monitask.com/wp-content/w3-webp/uploads/2022/01/Print-4.pngw3.webp)
4) Click the second button
![](https://www.monitask.com/wp-content/w3-webp/uploads/2022/01/print5-1024x337.pngw3.webp)
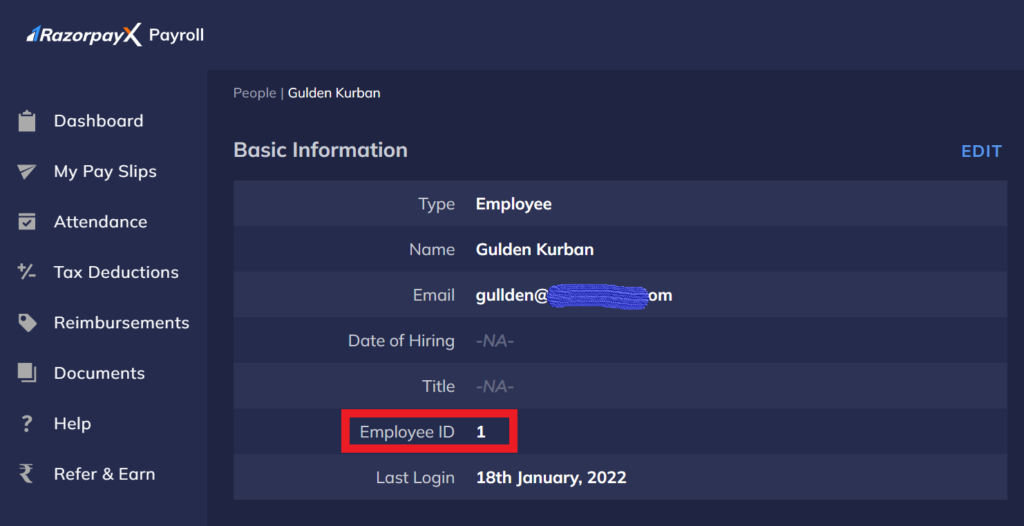
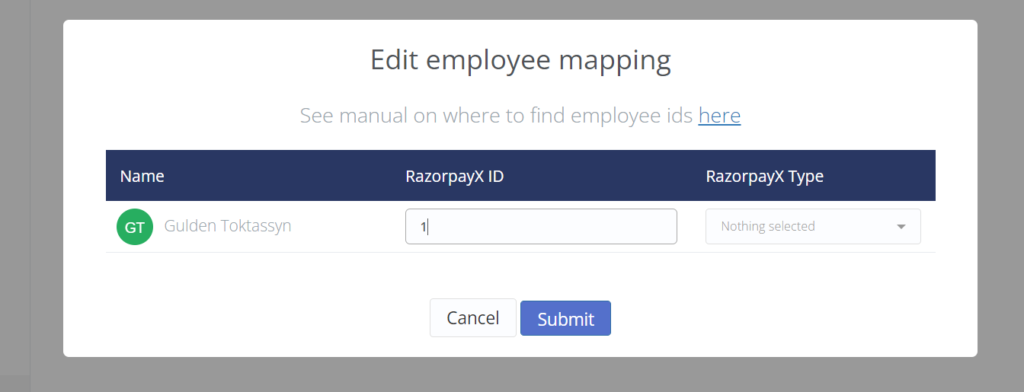
5) Open People on your RazorpayX menu and find needed employee’s ID and fill the form in Monitask
![](https://www.monitask.com/wp-content/w3-webp/uploads/2022/01/print7-1024x526.pngw3.webp)
![](https://www.monitask.com/wp-content/w3-webp/uploads/2022/01/print8-1024x392.pngw3.webp)
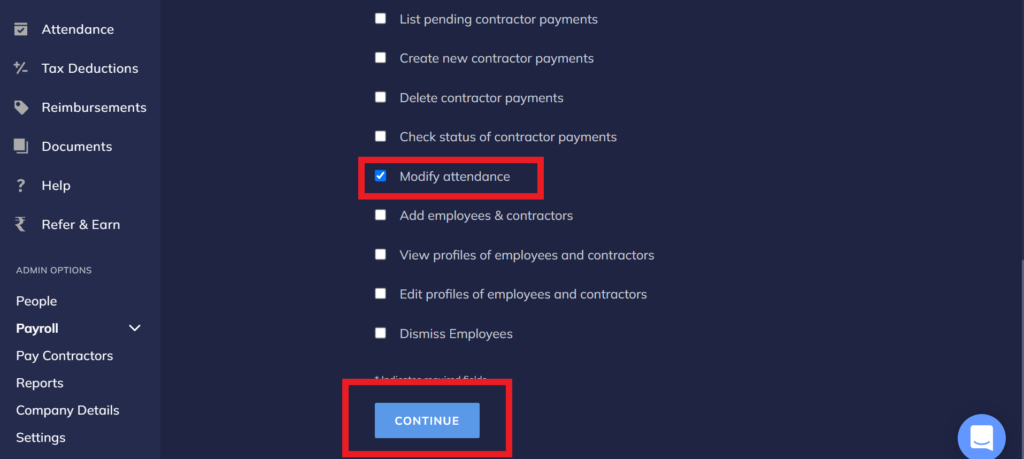
6) Open API Access in RazorpayX settings and give a permission to modify attendance.
![](https://www.monitask.com/wp-content/w3-webp/uploads/2022/01/print11-1024x459.pngw3.webp)
7) Open timeline. Then Click the button Sync to RazorpayX
![](https://www.monitask.com/wp-content/w3-webp/uploads/2022/01/image-7-1024x397.pngw3.webp)
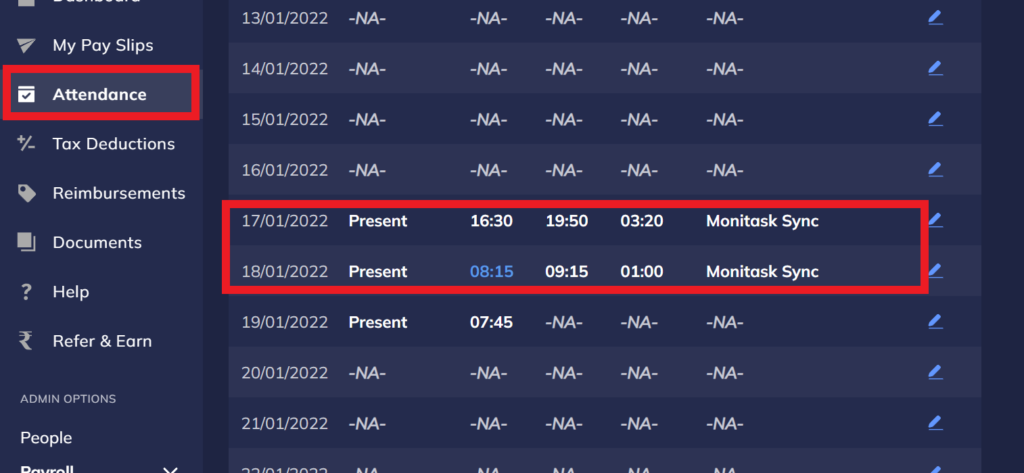
8) After all the steps you will see sheet will be integrated with your RazorpayX. You can see attendance in both Monitask and RazorpayX
![](https://www.monitask.com/wp-content/w3-webp/uploads/2022/01/print12-1024x473.pngw3.webp)